As the years speed by us and we see the advent of new technological discoveries, we also get to see improvements in many of our current devices. From mobile phones to computers, there are many improvements and advancements that have been made in the past five years alone.
We have progressed from owning a computer that came with a screen which was separate from the hard drive box, not to mention that the keyboard, mouse and even the speakers were separate as well.
Today, however, we can have all these components packed into one very compact and streamlined package. Added to this, the amount of space which we have available on our hard drives is definitely a great improvement on the tiny amount of space which was allocated to those old hard drives back in the day.
As time passes, things change; this is something that is very noticeable in our current computerized era with everything being available to us at the mere tap of our fingertips. It’s all about being digital and up to speed – speed being the operative word.
So what happens when our computer doesn’t run quite like it should … or when our technological buddy runs out of disc space? Frankly, running out of space is something that tends to sneak up on us like a thief in the night – and it always tends to happen at the most inconvenient of moments.
On our mobile devices it always happens in the middle of a moment which we are trying to document but can’t because the memory disc is full and it refuses to save the video/photo.
On our computer, however, it might take a little longer to run out of space than our phones, but it does still happen. When we first buy our new Windows Computer, we don’t anticipate running out of space since they tend to come with quite a large storage space. However, as time goes by, that space starts to fill up steadily as we gradually add more programs and more documents, photos and videos.
Then one day we get a notification that our computer is low on space …
Immediately, that sinking feeling hits you and you wonder how on earth you are going to free up enough space on your computer in order not to get that notification again anytime soon. Well, in this article we are going to help you explore six quick ways to free up more space and stave off the hungry space wolves.
1. Run a Disc Clean Up — Regularly
The first way we will discuss is to do a regular hard disc clean up. It is usually pretty quick and very easy to do. Open up your file location and under the heading Devices and Drives you will see your hard drive and any other drives you may have added.
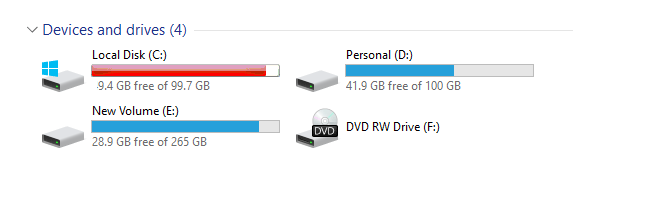
You will clearly be able to see which one is the one running out of space as it will display in red. To clean up the clogged up drive, right-click on it and then select Properties. Next you will need to left-click on the Disc Clean-Up button.
This then runs through a process, checking how much space can be freed up and once it is done running it will show a pop-up window where you can select all the files you wish to delete.
To select a file to delete, simply click on the little check box so that a tick appears in it. When you are done selecting all the files you want to delete, simply left-click on the Clean Up System Files button and it will run the disc clean up for you.
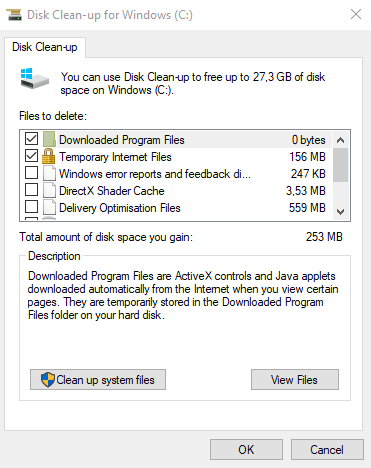
Once you click on the Clean Up System Files button, it will ask you if you are sure you wish to delete these files. Select Yes and once the clean-up has finished running you will find that you have freed up quite a bit of space. You can also make use of a program called CCleaner to run a full system clean-up operation.
2. Make a Habit of Emptying the Trash
We are all accustomed to having to do some housekeeping at some point or other in our lives. It is a necessary part of life that we have to take out the trash on a weekly basis.
The same is true even in computing. As we go through our day to day operations on the computer, we may delete old files we no longer need, or perhaps pictures that didn’t come out right or a corrupt file or video.
When something is deleted, it gets sent through to the recycle bin — or trash can. We may think that once we have deleted the file it is gone … but it sits in the recycle bin like a little, ghostly version of its former self.
The recycle bin can fill up quite fast depending on how organized we are in getting rid of things that don’t need to be on the computer anymore. However, unless we empty the bin out, those deleted files just sit there taking up space.
So, it is crucial that we make a habit of emptying out the trash can regularly. The recycle bin is easily visible on your home screen as it is depicted by a trash can icon. All you have to do is right-click on it and then choose the option Empty Recycle Bin and then, when asked if you want to permanently delete all the files, simply left-click on Yes.
3. Uninstall Unnecessary Space-Hoggers
As time progresses, we tend to make quite a few changes in our lives. Changes to the types of music we like to listen to, or perhaps we installed some games for our children (or grandchildren) to play during the holidays and now they don’t get played anymore — or maybe we have some applications installed which we no longer have any use for.
Whatever the case may be, it’s a safe bet to say that there are at least one or two installed programs on our computer that we just don’t need or want anymore. In this case, it is then better to uninstall and get rid of these space hoggers as this will immediately free up some extra space.
To uninstall a program you will need to left-click on your Start menu and then left-click on Settings (depicted by a cog shaped icon) and then on Apps.
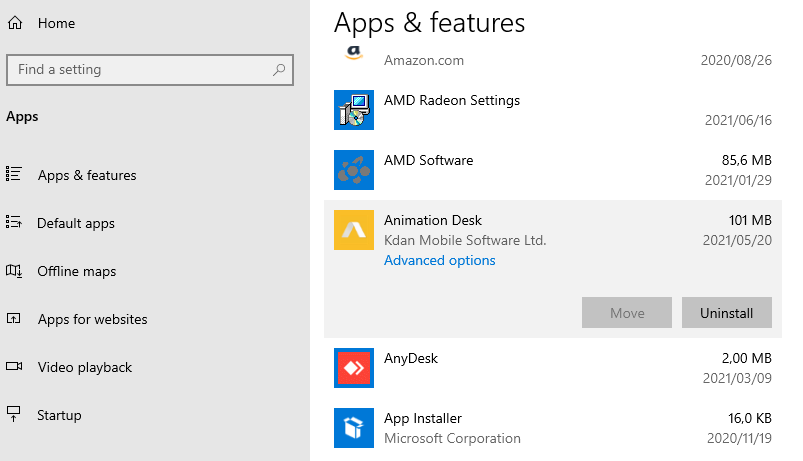
From the list you can then select whichever programs you no longer need and uninstall them.
4. Find and Get Rid of Duplicate Files
Unbeknownst to you, you may store files in duplicate. This also ends up taking up quite a substantial amount of space on your Windows computer. So it is best to make sure that you find and get rid of these duplicated files at least once every few months. As you can imagine, keeping duplicates of videos and large photos can really take up a lot of much needed space.
The quickest way to get rid of duplicate files is to use a third party application like WinDirStat or Auslogics Duplicate File Finder. Simply download and install the program and then follow the prompts to allow for a quick and easy clean-up of all your duplicate files.
5. Empty Out the ‘Cookie Jar’
Pretty much all websites that you visit use cookies. As you browse through the internet you will come across many messages that pop up saying their sites make use of cookies.
What you might not be aware of is that your computer keeps track of these cookies and stores them away. Over time this can start to really eat away at your space.
This is why we suggest that you find and empty out your cookie jar on a regular basis. To do so, simply type Cookies into your search bar. Then you will left-click on Delete Cookies or Temporary Files.
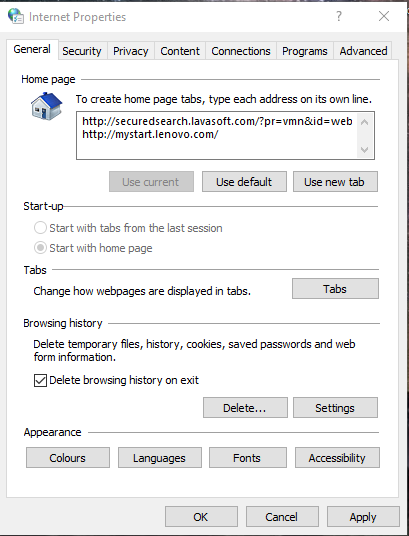
Make sure that there is a check mark in the box Delete Browsing History on Exit and then left-click on the Delete button. This will open a window that will enable you to choose which history etc you would like to delete. Once you have checked the boxes you want to, you can then go ahead and left-click on the Delete button.
6. If All Else Fails, Call for Backup
Of all the points above, this one is probably the most simple and effective as it provides immediate relief from your current space issue. Nowadays, buying an external hard drive is very cost effective and you get far more for your money than in days past.
Added to this, it is always a good idea to have an external hard drive for doing back-ups in any case – so why not use it to store some of the files which you don’t really need to have on your computer?
An external hard drive comes in many different sizes and shapes, but it would be a good idea to get one that is at least a terabyte (1TB) in size as this will be able to store your phone back-up as well as your computer back-up and other files without breaking a sweat.
Use It Or Lose It!
A good point to keep in mind is that if you haven’t used a program or looked at a file in more than a year, it’s probably best to get it off the computer. Files can be moved to the external drive and programs can be uninstalled.
If you follow these few quick steps you will be able to clean out quite a bit of space and be able to get your computer back into peak operating mode. Remember, too, that the more clogged up your computer is, the slower it will run. So if you want your computer to be running at optimal speed, its best to keep it clean and tidy at all times. As always, if you’re needing any kind of additional help freeing up any much-needed space on your Windows OS computer, consider reaching out to HelpCloud Technicians for remote support.
