
Ever had one of those days where you just can't seem to find anything you need and you're left wondering where on earth you stored that specific document you're supposed to send off today but now can't find?
Whether you are working with paper documents or computerized files, organization and file management is the key to keeping everything running smoothly. Nobody likes a messy desk with papers everywhere -- nor does a messy computer system bring peace of mind.
Properly organizing the files on your computer can save you an inordinate amount of time and stress, but it can also make your life so much easier. Not to mention that you can speed up your computer by clearing out old files, deleting unimportant files and in case of emergencies you can make sure that all of your files are saved and backed up so that if something goes wrong with your computer you will at least have all the important stuff saved in a safe place.
What you might not have realized, though, is that your computer comes with some handy management tools which will help you in organizing and managing the files on your computer, from cleaning out the unnecessary to saving important documents and files in a safe location that is easily accessible. All you have to do is know where to look.
How to Clean Up Files
In the beginning it was just you and your brand new computer, devoid of clutter and ready to be filled with all your favorite things. Only now it has been a few months or years and your computer isn't running like it used to, there isn't much free space anymore and you can't really figure out what all the files are that are hogging the space.
So it is time to roll up your sleeves and employ the aid of Disk Cleanup. Believe it or not, this nifty tool may just become your new best friend when it comes to cleaning up those unused and unwanted files on your computer.
To open up the Disk Cleanup app on your computer, navigate to Start and type in Disk Cleanup. The program will scan your computer (this may take anywhere between a few seconds and a few minutes, depending on how much clutter you have) and then it will open a window and show you the places where you can clean up and how much space it will free up.
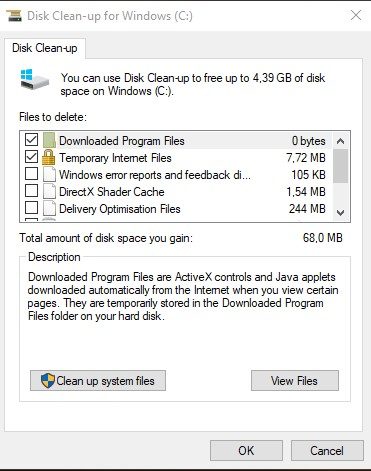
Scroll down the list and make sure you place a tick mark (you can do this by left-clicking on the checkbox) inside the check boxes next to the files you are going to clean up. Once you have done this, all that is left to do is to left-click on OK and let the program clean up those files for you.
You will notice that there is also a button with the option Clean up System Files. This is your next step in the cleanup process, so go ahead and left-click on this button and then wait while the program runs the scan on your computer to see what system files need to be cleared out.
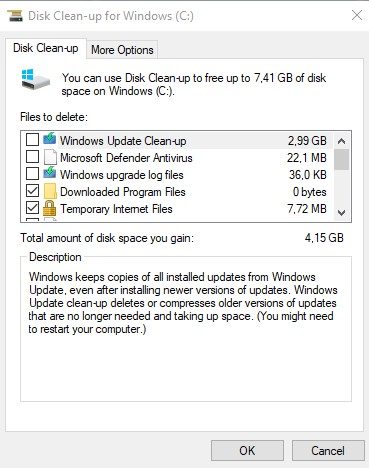
While the window is the same as before, it has added a few extras on the list of files to be cleaned up. It will also clear up more space on your computer, so it is a good idea to do this at least once every few months. After you have ticked the check boxes next to the files you want to clear out, you can go ahead and left-click on OK and then let the program do its job.
How to Delete Old Files
You may not have realized it, but there are a few ways in which you can delete old files from your computer. For starters, the way many people employ is to simply left-click on the file they want to delete and then just hit the delete button on the keyboard. This is one way of doing it, another is to right-click on the file you wish to delete and then select the Delete button.
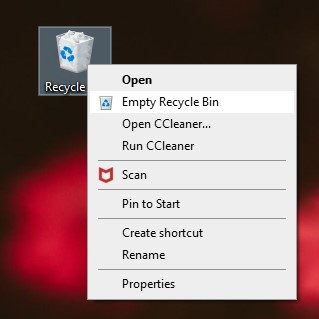
However, the file isn't permanently deleted by doing this; it goes to the Recycle Bin and will still take up space on your computer until you empty the Recycle Bin. To empty out the trash, simply right-click on the Recycle Bin shortcut on your home screen and then select Empty Recycle Bin.
A window will pop up asking you if you are sure that you want to permanently delete the files. Left-click on Yes and the files will then be deleted.
If you wish to delete files without first sending them to the Recycle Bin, you can select the file you wish to delete and then press CTRL + Shift on your keyboard. You will be asked if you are sure you wish to permanently delete the file and you can then just left-click on the Yes button.
How to Segment Files
Much has changed since computers first came out ...
Files, images and documents have grown in size and this can cause quite a problem when trying to transfer them to a different location or send them via email -- especially since emails usually have a size limit of what can be sent as an attachment. This can be highly frustrating, but instead of giving it up as a lost cause, why not try segmenting the file instead?
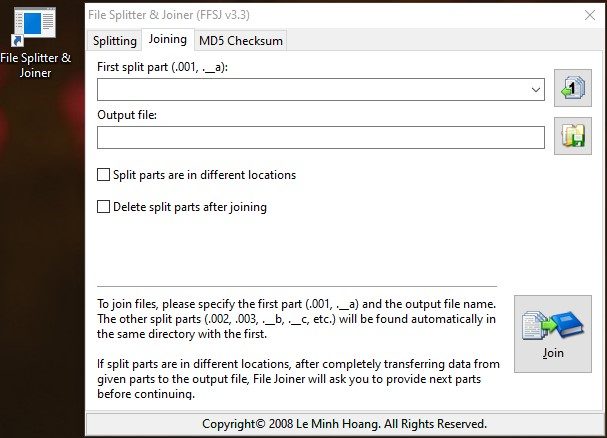
Windows comes with the built in ability to put files back together, but unfortunately it doesn't have the same ability to segment, or split, files. So for this you will need to install a third party program. Whilst there are many different programs out there, The Fastest File Splitter and Joiner is a good one to use and will do everything you need it to do. It's a free program and also easy to use.
Open your web browser and type in The Fastest File Splitter and Joiner, then navigate to the download page and download the program. Once it has downloaded, you will need to install it. After the program has installed it will save a shortcut to your desktop so that it will be easily accessible for future use. To open the program, simply double-click on the File Splitter and Joiner app on your desktop.
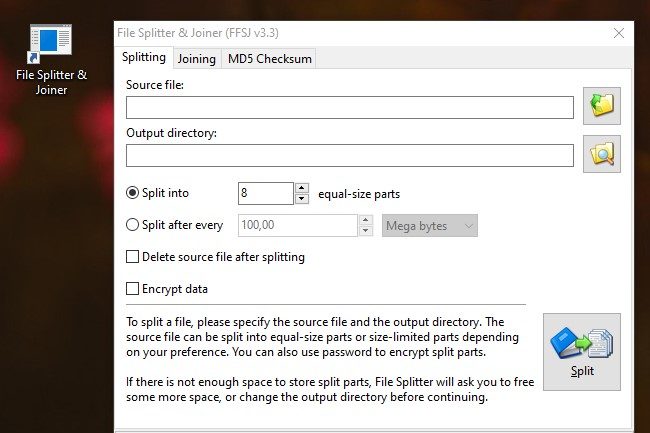
The program is really easy to use -- simply make sure that you are on the Splitting tab, and then select the source file by left-clicking on the folder icon to the right of Source File. You can also decide into how many parts you wish to split the file.
Next, you will need to select the place where you want to send the file to by left-clicking on the icon that shows a folder and magnifying glass to the right of Output Directory. Once you have done this you can go ahead and left-click on the button that says Split.
When you want to join the split parts together again, simply select the Joining tab at the top of the window, select the place where you stored the split file and select the first part of the file. Choose the place where you would like to save the joined file by left-clicking on the icon next to Output File. Lastly you just need to left-click on the button that says Join.
Another program that you could use if you need to send large files via email is to use 7-Zip which will allow you to zip files to make them smaller and even split the file into segments if need be.
How to Properly Back Up Key Files
It's common knowledge these days that we need to back up our files and programs. There are also a few options to choose from when backing up. You can back up your files to another folder on your hard drive, or you can back up to a flash drive or external hard drive, or alternatively you can back up to a cloud server.
To back up to an external hard drive or flash drive, simply plug the drive in to the USB port on your computer and then navigate to Start, select Settings (depicted by a cog-shaped icon) and then select Update and Security. On the left-hand pane, left-click on the Backup tab and then select the option Backup using File History.
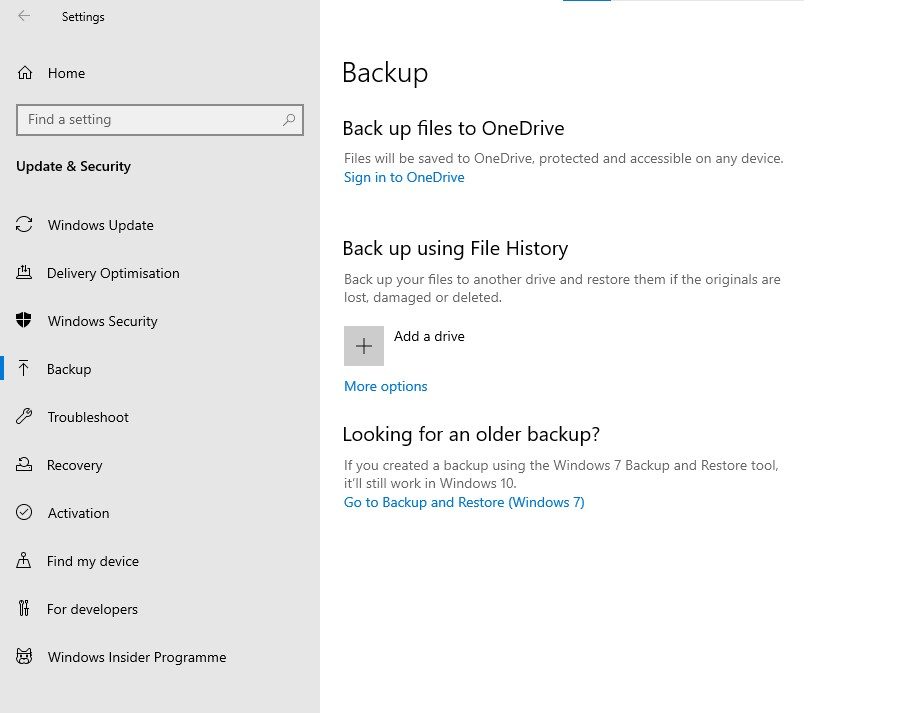
Left-click on the drive you have plugged in and then make sure that you toggle the switch that says Automatically back up my files to the on position and then hit the backup switch. Your files will now automatically back up to this drive every time you plug it in.
Under the Backup tab you also have an option to backup to OneDrive. If you have a OneDrive account, this is a good idea as it will then store your files in a cloud server in case anything happens to your computer.
You can also backup your files to Google Drive. Due to the fact that every individual has different needs and preferences, the program you use to back up to a cloud service entirely depends on you.
However, that being said, no matter what your needs are, it would be a good idea to make sure that you make more than one backup. For example, don't just make a backup on your current computer - be sure to save your files to an external hard drive as well as making a cloud backup as well if possible.
When spring time rolls around, many people embark on a spring-cleaning mission to clean the house and car etc. But why stop there? Your computer needs the same kind of tender loving care which you bestow on your home and car -- perhaps more so, in a way, due to the fact that you probably need it to do the work which pays for the home and the car. So when next you're spring cleaning, remember to add your computer to the list of things that needs cleaning.
As always, if you're needing any kind of additional help with the basics of file management on your computer, consider reaching out to HelpCloud technicians for remote support.