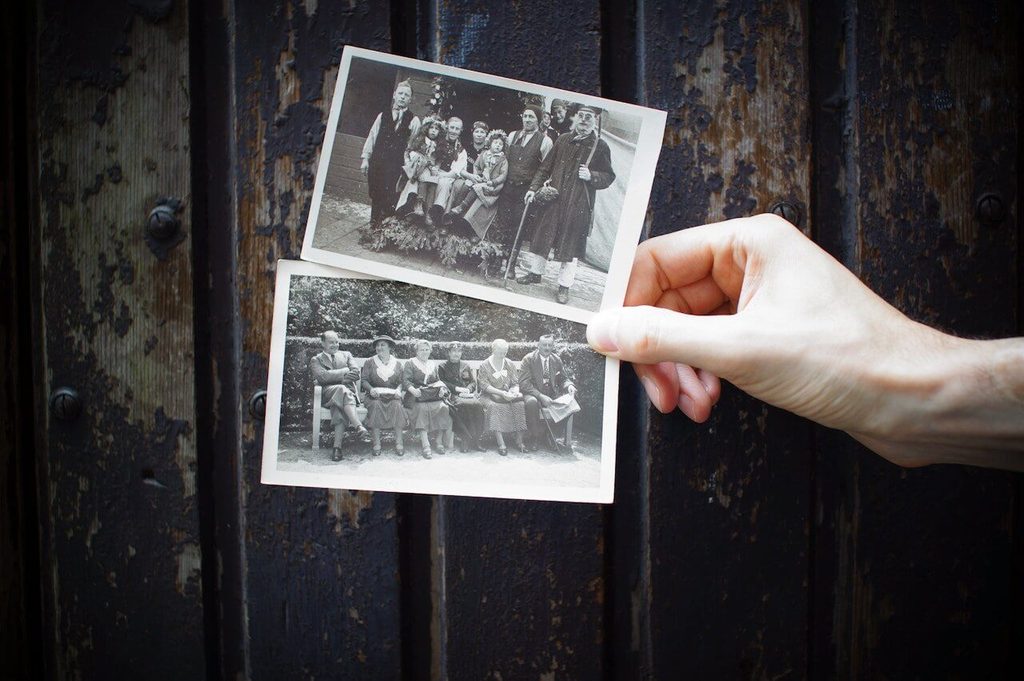
It’s pretty crazy that some of your most important memories might live in a box. Even if you’re organized enough to store old photos in an album, it’s all too easy for them to be lost, damaged and gone forever.
Luckily, there’s a fast way to fix this issue. Various technologies can help you digitize your images. It is always a good idea to save a digital copy of your old photos in the case that something happens to the hard copies and originals. Save and share your memories!
If this task is too difficult for you and you want professional help then reach out to HelpCloud Technician by-the-hour.
1) The Benefits
If you have photos, slides and even negatives, you can benefit from making them digital. All traditional photographs fade and become discolored over time. The only way to save them forever is to put them in the digital world.
Digital images can’t get scratched or torn, and they won’t age like traditional prints. It’s also easy to reproduce a digital image on a variety of mediums without compromising the integrity of the original copy.
Another upside is increased organization. With a digital library, you’ll never need to sort through piles of photos again. Online, it’s easy to find the exact photo you’re looking for right when you need it.
When your images are digital, it’s easier to share them, too. You can share them as you like over the internet with the people who matter the most to you. Furthermore, before you share your photos, you can update or improve them in a variety of ways.
If you see something in the image that needs changing, you can edit it on your computer. If you’re someone who enjoys albums, you can arrange your pictures into an online book that you can view on the internet or print a copy for in-person viewing.
2) What Is ‘Digitizing,’ Exactly?
Digitizing, or digitization, is the process of changing something into a digital format. Once information is digital, it’s stored in units of data called bits.
Digitized information is easier to preserve, access and share. For example, if you have a paper photo, you have to keep it in good condition and know where it is at all times.
You may also only show it to people who are in the same physical location as the photograph. If you digitize the photo, you can preserve it forever, find it easily and be able to show it to virtually anyone around the world.
3) Timing
Have you heard the cliché “You should have started yesterday” before? When it comes to digitizing your photos, the earlier you start, the better. That being said, if you haven’t initiated the process yet, you’re not too late. The right time to get the ball rolling is now.
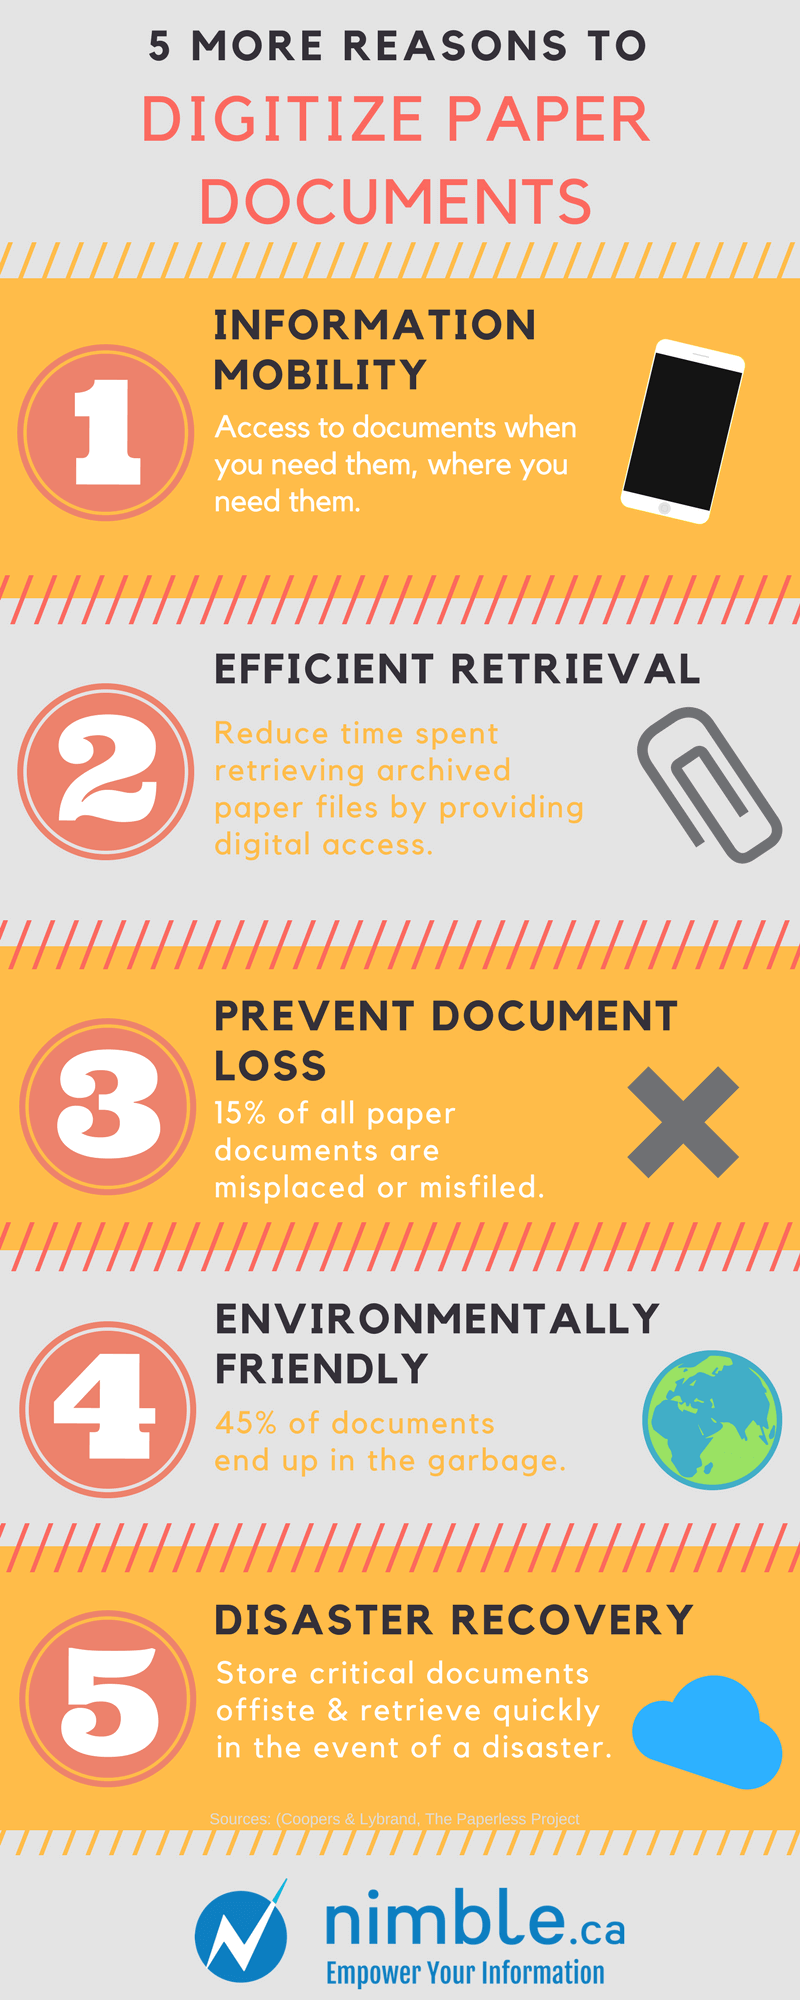
As dark as it may seem, you never know when an emergency will strike. Archiving your photos, negatives and even documents is an efficient way to safeguard your information against disasters and emergencies. With this information online, you can rest assured that your important documents and prints won’t be lost.
Another great reason to digitize your images as soon as possible is long-term time savings. Maintaining, locating and checking on the quality of paper photos can take hours, days or even weeks. Although uploading them will take some time, once they’re online, they’re very easy to search through, which will save you countless hours.
Digitizing your albums today can also help you save money. Preserving old photos and transporting them from house to house or storage unit to storage unit can be costly.
Once they’re in a digital format, you can save them online on a free or inexpensive platform, cutting down on expensive restoration services, storage costs and transportation fees.
4) Uploading
Overall, the easiest way to turn your paper photos into digital pieces of information is with a scanner.
There are several photo scanners you can purchase that convert negatives, prints and slides to digital. You can also hire a company to scan and convert your images for you, but they generally charge a fee for photo, which can become quite expensive.
For those with a lot of photos, investing in a scanner is often a worthwhile option.

Once you’ve found a quality scanner, read its manual or research online to set it up properly and connect it to your computer. Once all of your setup is done, you should be able to scan multiple images at once. All you need to do is arrange your photos on the bed of the scanner and make sure they don’t overlap. Then, follow the scanner’s directions to scan the images.
5) Storage Choices
Once your old pictures are in a digital format, you’ll need to decide where you’re going to save them. There are a few places you can store your photos for safekeeping, but it’s often best to back them up in two different locations. This way you can make sure that you always have a digital copy of an original photo.
A) Save in the Cloud
The first place you can store your photos is in the Cloud. If you’re like almost everyone outside of the tech industry, the cloud is a confusing buzzword, much like the Internet of Things, that’s anything but straightforward.
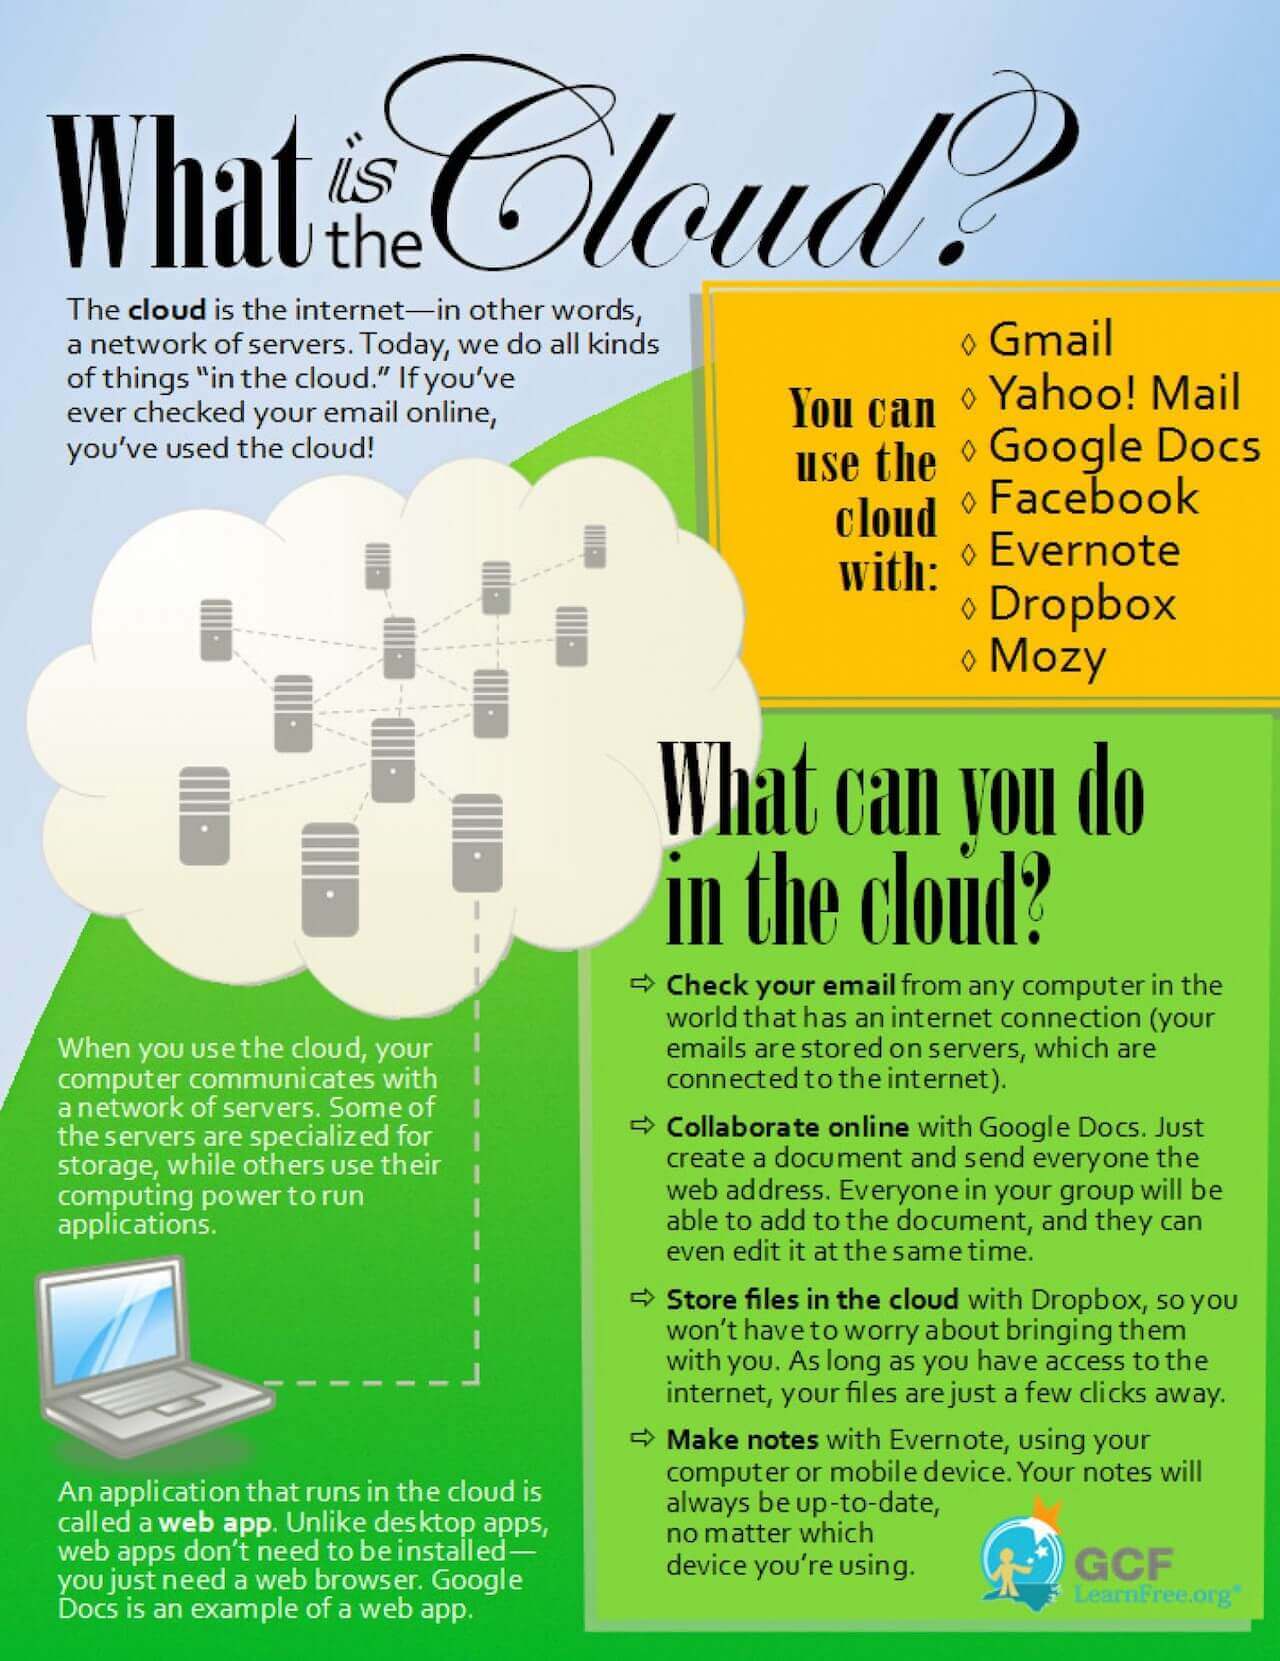
Simply put, the cloud is an internet-based technology that can run software and services. To access the cloud, you generally have to have a web browser, like Google Chrome, Safari or Firefox and internet connection.
One example of a service that’s in the cloud is Netflix. As long as you have an internet connection, you can access your Netflix from a variety of devices and stream information. Another example is Google Docs, which is similar to Microsoft Word but is stored in the cloud.
The only thing to keep in mind about the cloud is that if you’re not careful, your information can fall into the wrong hands. You need to select a cloud company that has security measures in place so that your photos and private information will be protected from hackers.
iCloud Photo Library
If you have a Mac computer or an iPhone, one storage option is iCloud Photo Library. In addition to saving your digitized photos on this application, you can also use it to save the images you take on your iPhone, iPad, etc.
This platform syncs with your devices via Wi-Fi, which makes it easy to upload your photo library and back it up on the web. To start, the service is free. You can also pay for one of three iCloud storage tiers if you need additional online storage space.
Google Photos
Individuals who don’t have a Mac or iPhone will likely prefer Google Photos. It’s easy to connect a variety of devices to this versatile, online cross-platform photo manager. Like iCloud Photo Library, there are free and paid versions of this service.
Flickr
Flickr is another option that can be used to store pictures and videos online. The Yahoo-owned service is used by many to store compressed versions of their content. For example, video playback on the application is constrained to three minutes. Individuals with long family videos or lots of images may benefit from one of the two options above over Flickr for maximum storage space.
B) Save On a Computer
One of the best ways to backup your cloud-based media is on your computer. When you scan images, you can save them somewhere on your computer. Often, it’s best to create a folder on your desktop and then save scanned media directly in the folder.
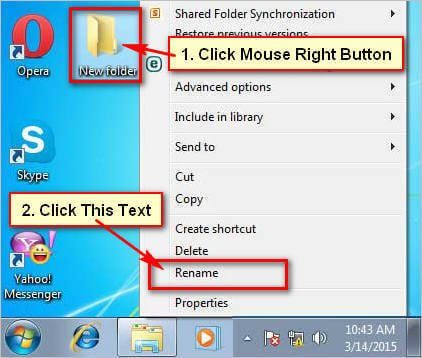
If you have a PC or run Windows 10, the fastest way to make a new folder is with the shortcut CTRL+Shift+N. After clicking anywhere on your desktop, hold down the “Ctrl,” “Shift” and “N” keys at the same time.
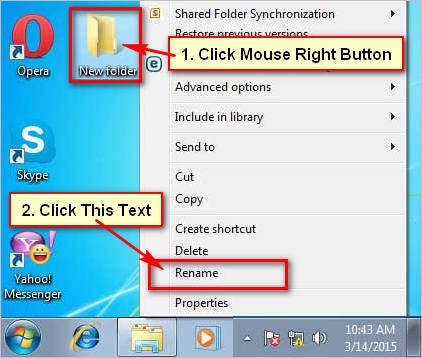
When you do this, Windows should create a new folder, which is often labeled as “New Folder.” You can change the name of the folder to something like “Photo Album.” Once it’s named, you can add your scanned images to the folder and save them.
Mac users can create a new folder by clicking on the desktop. Next, click “File” followed by “New Folder,” which should appear on the drop-down menu.

Another option is to click on the desktop and then hold down the keys “Shift,” “Command” and “N” at the same time. The new folder should then populate, and you can name it however you’d like. You can also drag the folder around your desktop until it’s in the right position.
Once it’s exactly how your prefer, you can save your digital media in the folder.
External Hard Drive
Depending on how many photos you have, you might want to consider storing them on an external hard drive. Your computer only has so much room, and if you use most of its storage space for images, it might run slowly and struggle to perform at its maximum capacity.
Storing your pictures on an external hard drive is a great option because these drives are portable, easy to use and offer a lot of storage space. Another great reason to store your photos on an external hard drive is because it makes it easy to move them from computer to computer.
The End-All
Never before has it been so easy to take your photos and save them in a cost-effective, safe and timeless format. Given this opportunity, there’s no reason not to dive in and digitize your images today.
However, learning a new technology and process all at once can be overwhelming, which is why it’s important to slow down and take it step by step. With a little effort and time, you’ll soon master how to digitize your photos and propel them into the future for safekeeping.
