
Table of Contents:
- Identifying Common Headset and Microphone Issues
- Echoing or Feedback
- Distortion or Crackling
- Low Volume
- Headset or Microphone isn’t Recognized
- Connecting on Cue
In the years since the first computer came on the market, technology has improved in major leaps and bounds. Phenomenal steps have been taken to gear up the speed and performance of these machines, to make them smarter, smaller, and lighter and so much more.
We are now able to carry around a device that can act not only as a computer in its full capacity, but also as a phone, a way to get in touch with loved ones and a way to do business, all whilst being on the go.
Best of all, these calls can be either audio or visual. Thanks to the improvement in technology and all the wonderful advancements, we can now make a video call and be able to see the person we are contacting. It is even possible to switch between audio and visual as one chooses! What more could one ask for?
Unfortunately, all these amazing advancements come with their own set of challenging problems. For instance, problems with the microphone or that irritating crackling noise in the headset. It can be highly frustrating and annoying to sit down to a video call only to find that the person you are speaking to can’t hear a word you are saying.
Even worse would be to connect with the wrong speakers or microphone during an important meeting. Since we are currently living in a socially distanced environment where, for the most part, meetings and conferences are held online, this is something that is really important to have as a perfected skill.
Therefore, in this article, we are going to tackle a few of the ways in which to combat the most common microphone and headset issues, as well as ways to connect to the correct microphone or headset during those important meetings and family calls.
Identifying Common Issues
It’s best to identify the common issues that can be faced when working with headsets and microphones before addressing the ways in which to fix them.
The most common microphone and headset issues include the following:
- There’s echoing or feedback.
- There’s distortion or crackling.
- The volume is far too low.
- Your headset or microphone isn’t recognizable.
While these are not all of the issues one might run into when using a headset or microphone, they are among the most common of the problems that cause such frustration and despair. Take courage, though, because following are some simple and quick fixes to get rid of these issues in no time at all.
Most of the time it can be just a really simple thing that has the most distressing effect and prevents one from doing what needs to be done. Thankfully, the simple little problems are also the easiest to fix!
Before tackling the problems, it would be wise to make sure that your computer has been rebooted. This is normally the first thing most technicians will ask, “Have you tried switching it off and then back on again?” So to forestall the inevitable, it is best to just do it before taking any further steps.
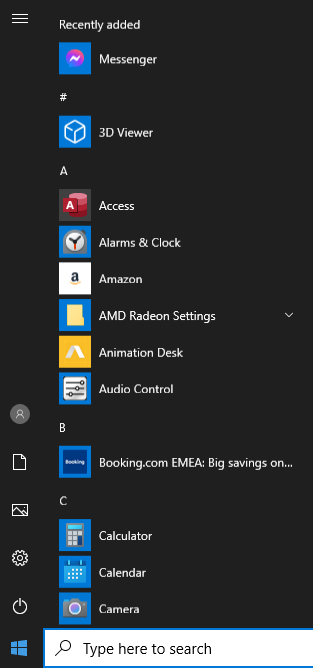
Next, check that the correct microphone device has been selected in your sound settings. To do this, click on the Start button in the left hand corner of your screen, then click on Settings (this could be displayed as a cog shaped icon).
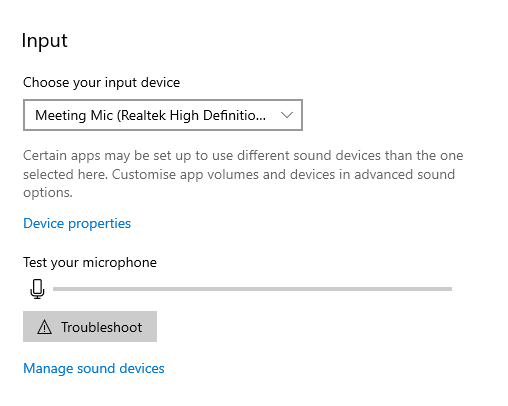
Now select System and then Sound. Make sure that under the Input tab, your microphone device is selected from the Choose Your Input Device drop down menu. If you are using a headset or external microphone, this will appear in the drop down menu along with the built in microphone on your computer.
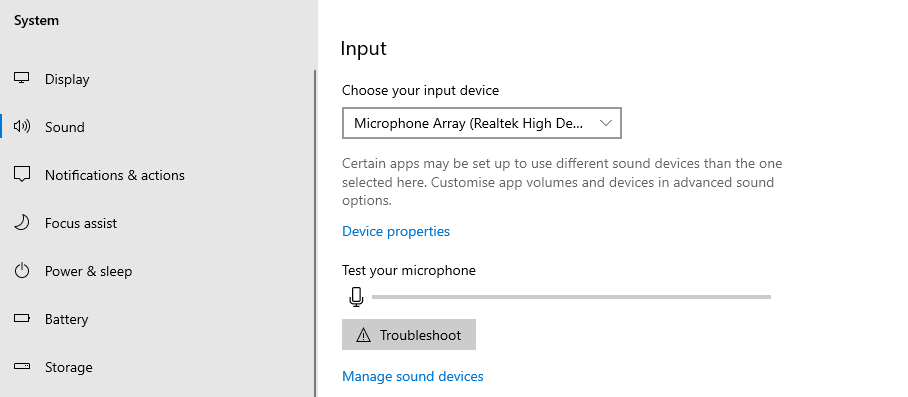
To test and make sure that your microphone is working correctly and that the correct microphone device has been selected, speak into the microphone and you should see the green bar below Test Your Microphone moving up and down. This indicates that it is picking up your voice.
Now we will sort out those other annoying issues that often crop up in the realm of online chatting and video calling.
Problem Solving
It doesn’t matter whether you’re using a headset, built-in microphone or USB microphone, the following tips should help to solve the problems you are facing for all of those devices.
1. Echoing or Feedback
This is a problem that could appear on either end of the call, but to ensure the effects are minimized on your end, it’s advisable to use a headset instead of external speakers when making calls because when you are using the built in or external speakers and microphone, the microphone will pick up the sound from the speakers and this causes most of the echo and feedback.
2. Distortion or Crackling
This issue can be caused by a few things. Firstly, if the program being used to chat on is outdated it will severely impede the quality of the call. It is best to make sure that whichever program you are using is updated to the latest version.
Then secondly, running downloads in the background whilst on a call uses up bandwidth and will slow your internet speed substantially, so that the video could end up being choppy or fuzzy, sometimes freezing. It is advisable to ensure that all downloads are paused whilst on a call.
It is also good to remember to make the call in a room where there is minimal background movement, as all background movement is picked up by the webcam and will make the program run slower or even become choppy.
Lastly, if you are still having a problem, go to Settings → System → Sound → Device Properties → Additional Device Properties and then click on the Enhancements tab and make sure that the box labeled Disable All Sound Effects is unchecked.
3. Low Volume
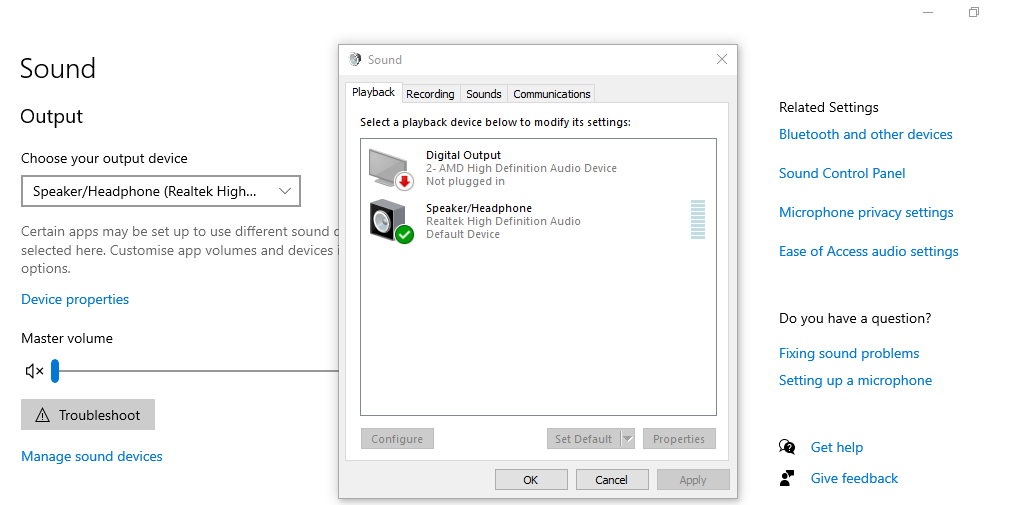
This is a very easy fix, simply go to Settings → Sound → Sound Control Panel (this is found in the menu that appears on the right hand side of the screen) and a pop-up screen will open up.
Click on the Recording tab at the top of the pop-up screen and then double click on your microphone/headset device, which will appear with a green tick next to it.
This will open up another pop-up menu.
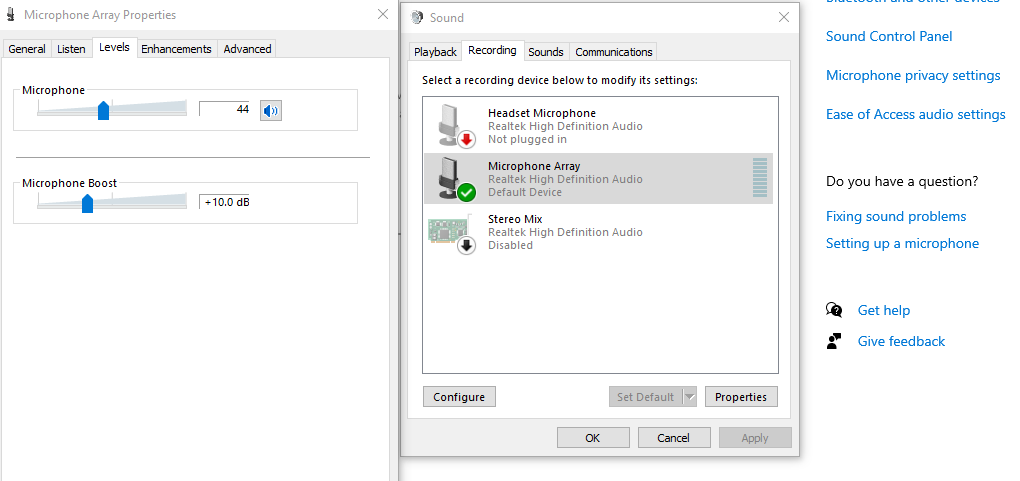
On this menu, click on the Levels tab. From here you will be able to adjust the microphone levels. So if the microphone is too low, you can just raise it and this ought to sort the problem out.
4. Headset or Microphone Isn’t Recognizable
To deal with this issue, go to Settings → Sound → Microphone Privacy Settings (this is found in the menu that appears on the right hand side of the screen) and a new screen will open up.
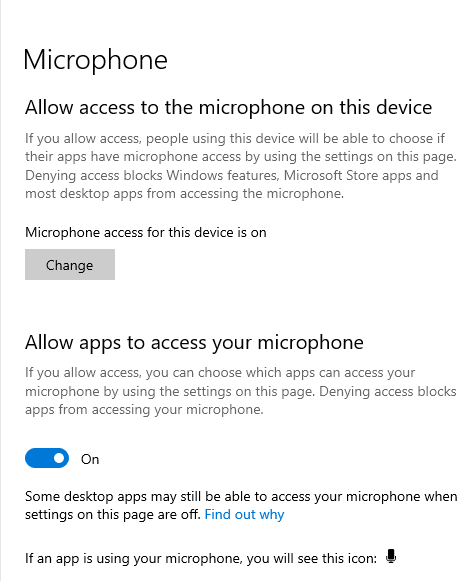
Make sure that under the heading Allow access to the microphone on this device that it says Microphone access for this device is on. If it doesn’t say that, then you will need to click on the Change box and toggle the setting to the on position.
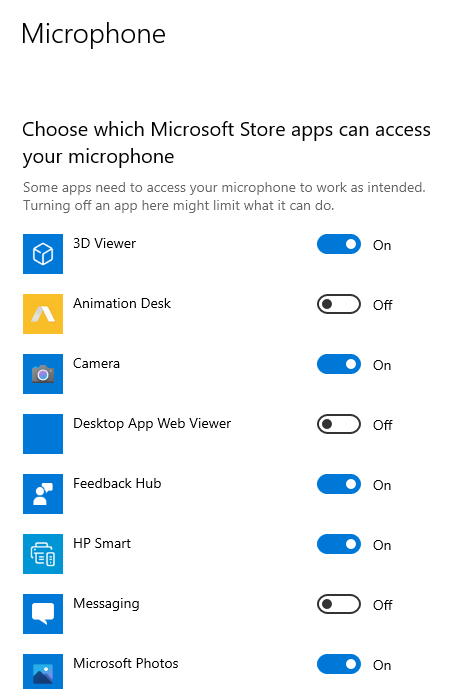
Another thing to check on is to ensure that under the heading Allow apps to access your microphone, the switch is toggled to the on position. Then check that, under the heading choose which Microsoft Store apps can access your microphone, the chat program you are using has got permission to access your microphone. If the button is in the off position, simply toggle it to the on position and access will then be granted.
Connecting On Cue
One of the best ways to prevent connecting to the wrong microphone or headset during a meeting or important call, is to give your devices specific names. For instance, instead of having the headset just named Realtek Headset (if this is the device you use for business meetings) rename it to Business. Some people have multiple devices. If so, rename each device appropriately.
To rename the Microphone or Headset device, once more go to Settings → Sound → Device Properties.
Once you have clicked on Device Properties, it will open a page and you will be able to rename your device. Exactly the same procedure is applicable for the output device. The device can be renamed under Device Properties in the Output section that is just above the Input section.
Keep in mind that the same name will need to be given to the Input and Output section for each device you which to rename. Then, when you want to switch between the headset or built-in microphone etc, simply go to Settings → Sound and choose your preferred device from the Input and Output drop down menus.
This should definitely help to alleviate the frustration of connecting with the wrong device for those important calls that you can’t afford to miss.
Speak Now (or Forever Hold Your Peace)
One last word of advice…during a call, no matter which application you use, there is normally a little microphone in the bottom middle of the screen. Make sure that this doesn’t accidentally get clicked on during a call as this will immediately mute your microphone and your words will go unheeded.
It is easy to see whether or not your microphone is muted. When muted, a forward slash (/) will appear through the microphone. To take the microphone off mute again, merely click on the microphone again and others will be able to hear you once more.
That is to say, unless of course you were meaning to mute yourself. This is acceptable and even required behavior in some meetings when it isn’t one’s turn to speak.
As always, if you’re needing more information about how to overcome the most common microphone- and headset-related issues, consider reaching out to HelpCloud Technicians for remote support.
