
Table of Contents: (click to jump to section)
- Parental Controls Explained
- Becoming an Administrator and Adding Users
- Setting Up Parental Controls
- Changing Parental Controls Remotely
Everywhere we turn these days we see technological advancements in all areas of life, and just about everything can now be done online. We can shop, study, work, and even keep up a social life online.
Due to current circumstances, we find ourselves relying even more heavily on technology than ever before. Our children now have interactive lessons instead of being in a classroom. Social distancing now being the norm, families and friends have to connect via online chat services and video conferencing.
While the ever-expanding web is a wonderful and useful tool in such a multitude of different ways, it is also a place of deep darkness, treacherously hidden threats, and a place where the unscrupulous hide, waiting to corrupt the unsuspecting innocent.
According to statistics, 34 percent of children in the U.S have experienced one form or another of cyberbullying at least once.
With this in mind, it is no wonder, then, that parents today want to monitor the screen time which their children are exposed to.
There are many free parental control software programs available, but thankfully, and much to the relief of many parents, Apple Mac has a wonderful tool built straight into it’s OS (operating system) which allows them to monitor what their children are doing online.
While it doesn’t take the place of parental vigilance, it does allow parents to breathe easier, knowing that their children won’t stumble onto a website that they shouldn’t be on.
If you need assistance setting up these controls then consider reaching out to HelpCloud Technician by-the-hour.
What Do They Do?
The parental controls are there, amongst other things, to provide a limit to how much time your child spends on the Mac. It shuts down inappropriate words in the Dictionary application, enforces specific screen time, blocks adult content, monitors app use and so much more.
No more do you have to stand hovering over your child’s shoulder, making sure they don’t stumble on a site they shouldn’t, or enter a chatroom they shouldn’t by mistake. You can set up the parental controls to do all of that for you, leaving you with peace of mind, knowing that you have put all protective measures into place.
These controls also allow you to set time limits on how long your children can use the Mac. If they have specific bedtime protocols, these can be set up on the Mac so that once the time limit has been reached, they will no longer be able to access any of the apps, etc on the Mac.
The following are some simple steps to guide you through the process of setting up the parental controls on a Mac device.
Becoming an Administrator and Adding Users
Before you can set up the parental controls, you need to first set yourself up as an Administrator on the Mac. Being an Administrator means that you can add and also manage other users on the Mac. It allows you to install apps and change settings.
Make sure that you don’t set up the automatic login for the Administrator, otherwise, anyone can restart the Mac and log in as Administrator. This will defeat the purpose of having parental controls, so you will need to make sure that nobody has access to the Administrator login and password.
If multiple people are using the Mac, you can set up an account for each person but you need to remain overall Administrator.
To create a new user, click on the Apple menu in the top left-hand corner on your Mac. Next, click on System Preferences and then click Users & Groups.
Click on the little lock icon to unlock it and then type in an Administrator name and password.
Click the Add button below the list of users.
Click the New Account pop-up menu and then choose which type of user you want.
Following are some of the different types of users:
- Administrator: An administrator can add and manage other users, install apps, and change settings.
- Standard: A standard user is set up by an administrator. This type of user can install apps and change their settings but they cannot make changes to any other users’ settings.
- Sharing Only: These users can only access shared files remotely, however, they cannot log in to or change settings on the computer.
Once you have chosen which type of user you want to create, you then need to type a full name for the new user. The account name will be generated automatically. If you want to use a different account name, you need to enter it now as you cannot change it later on.
Next, you need to enter a password for the user. You will need to enter it again to verify it. You will also be asked to enter a password hint, in the event the password is forgotten and you need to be reminded what it is.
Next, click on Create User. Now that you have set yourself up as an Administrator, you can go on and set up each user as well as the parental controls for each user.
Setting Up Parental Controls
To manage the parental controls for each user, you will need to complete the following steps.
Click the Apple symbol in the top left-hand corner of your Mac and then select System Preferences.
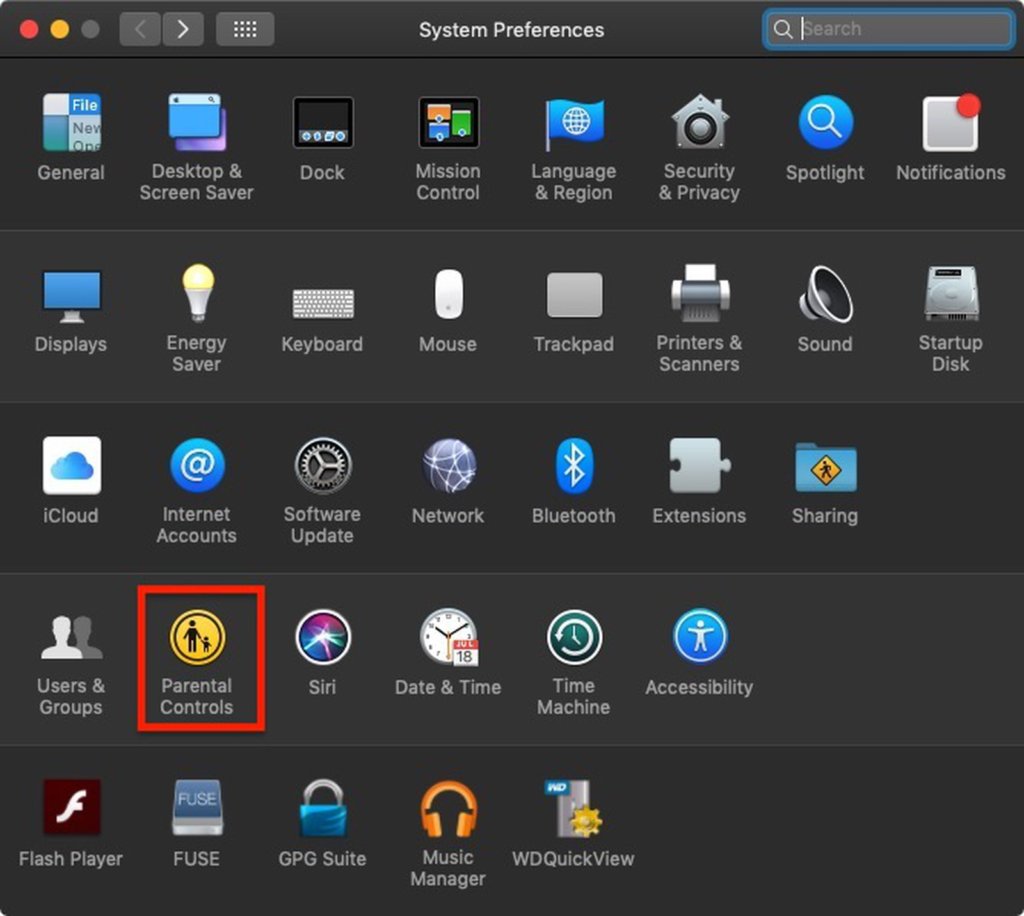
Next, click on the parental controls button. Click on the little lock icon in the bottom left-hand corner of the screen. Enter your administrator password when prompted and then click unlock.
Select the user account for which you want to set up the Parental restrictions from the tab on the left.
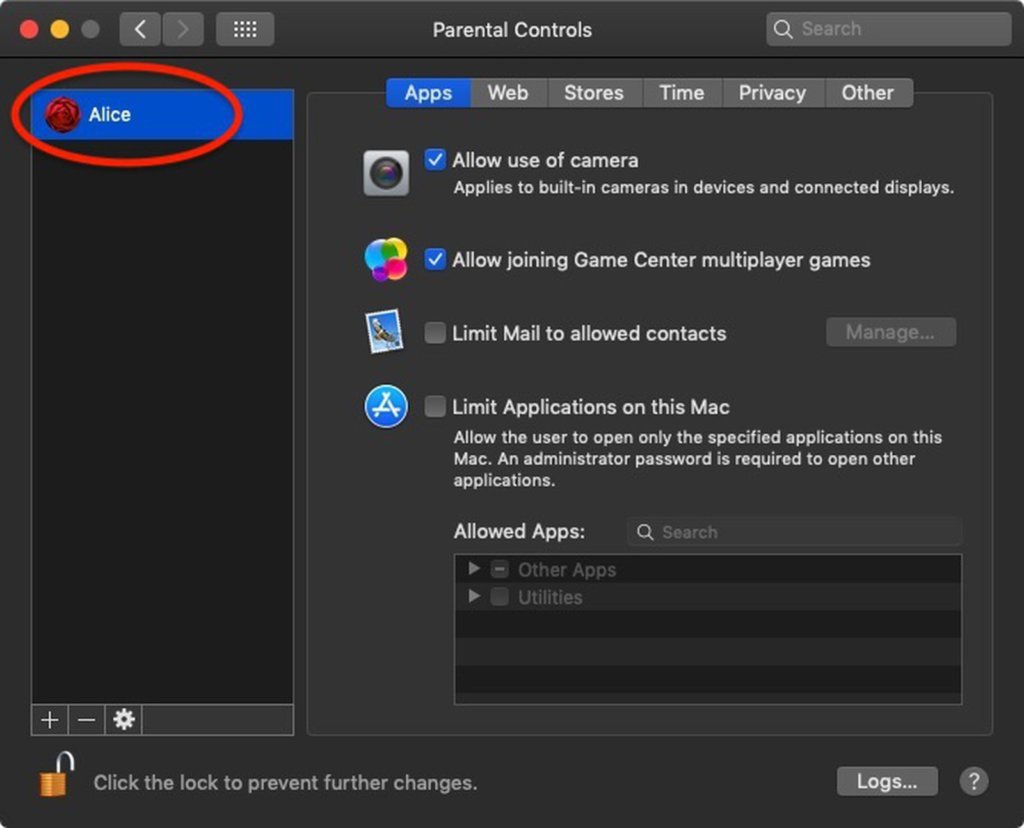
You will now see several restriction options that you can choose from and manage by clicking on the tab.
One very useful option is the Time Limits option. This allows you to set time limits for your child’s use on the Mac. This is especially handy for school days and limiting screen time during exams when they need to be studying. Just go into the parental controls tab, select the Bedtime setting, and then change the times to your preferences. You can adjust these times later on as well.
Changing Parental Controls Remotely
There are going to be times when you may want to change the parental controls on the spur of the moment without having to give a lengthy explanation to your child. This is one time when technology works to your advantage!
Before you can make these changes remotely, you will first need to ensure that the Mac is set up for remote use. To do this, go to System Preferences on the Mac and click on parental controls. Click on the lock icon in the lower left-hand corner and sign in with your Administrator password.
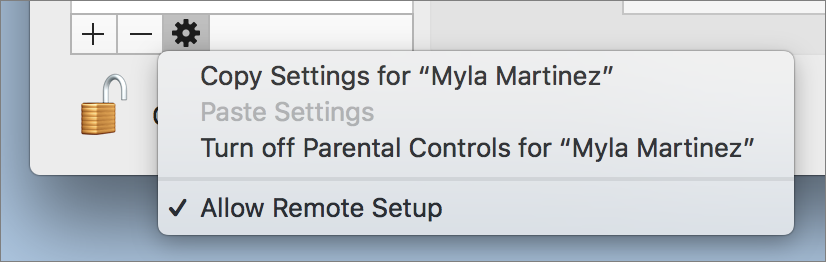
Next, click on the little gear-shaped icon just above the lock and choose Allow Remote Setup, this will allow a little checkmark to appear next to it.
Make sure that both devices are on the same WiFi network and that your child’s Mac is awake. On your own Mac, go into System Preferences > Parental Controls and click on the little lock icon in the lower left-hand corner and then sign in with your Administrator details.
An Other Computers heading will appear on the list of accounts showing in the left-hand pane. Select your child’s Mac from the Other Computers list and then enter your Administrator details in the dialogue box which appears.
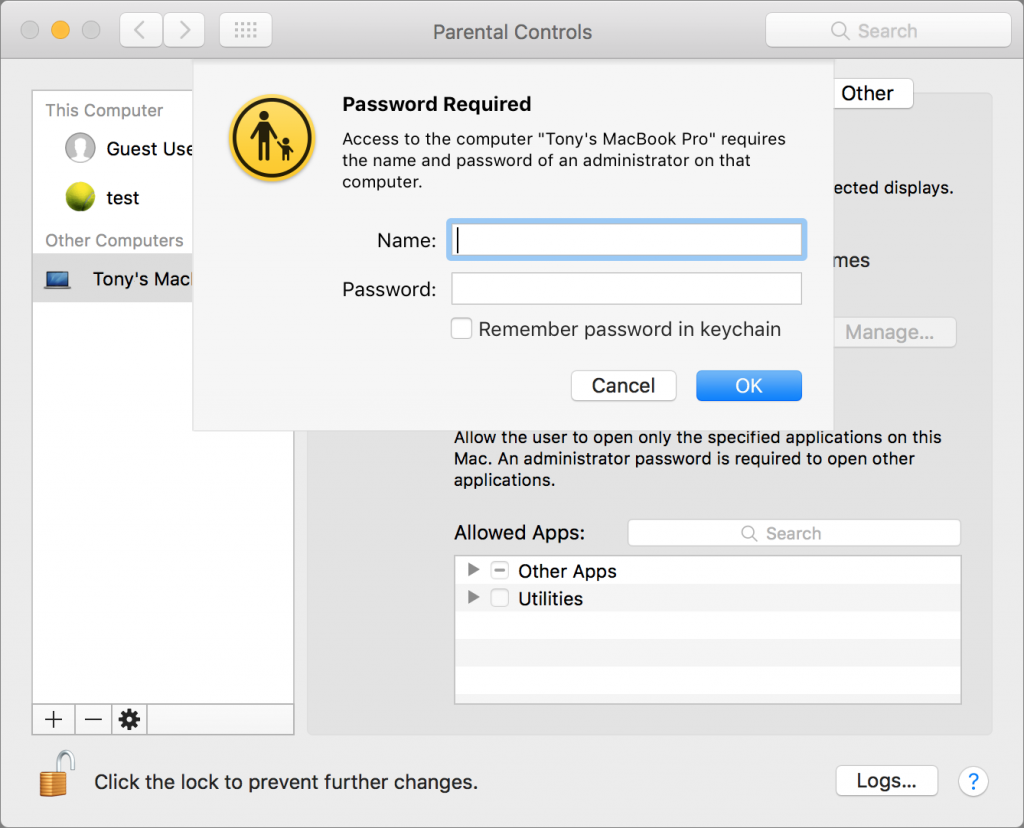
All the controls for your child’s Mac will now be visible on the right-hand side of the screen and you will be able to adjust them at leisure without your child ever knowing.
The Final Word …
The internet is becoming an increasingly more dangerous place to browse around. Even us seasoned browsers may still stumble upon a dodgy website or get conned into filling in our details on an unsafe site or even downloading a file with a virus.
While the youngsters of today are incredibly tech-savvy and probably know more about technology than we do, it is still necessary to keep them protected from the dangers which lurk out there on the dark web.
This is where the parental controls feature on Mac comes in handy. That said, it doesn’t take the place of proper instruction. It is crucial that we still make sure that we alert our children to the dangers which can be found online and even why we make use of parental controls.
Setting up the parental controls feature on Mac will allow you to let your child browse the web worry-free, shielded from unwanted content and undesirable sites. Regulating your child’s computer time no longer has to be an exercise in frustration, in fact, it has never been easier!
As always, if you are experiencing any kind issue with the understanding of or setting up parental controls on macOS, consider reaching out to HelpCloud Technicians for remote support.
