What It Is, Why You Need One and How to Get the Most Out of It
The modern world is changing rapidly. To navigate a growingly complex daily life, you need the right technology. Thanks to the Internet of Things, managing your smart home and smart devices is now easier than ever.
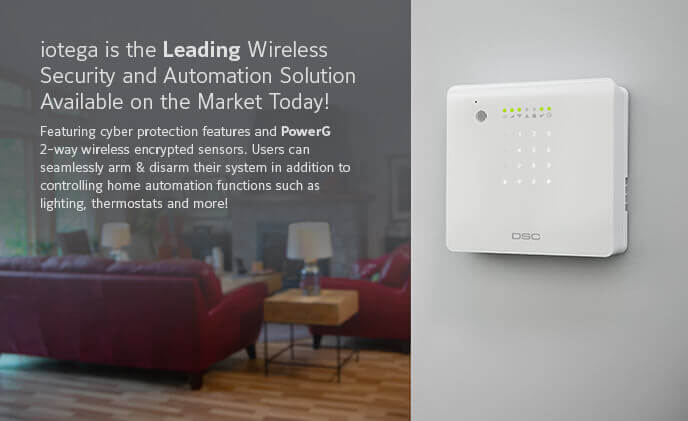
Whether you use motion sensors, an automated doorbell or a smart thermostat, you need to be able to control everything confidently and simply; this is where iotega, the next-generation home security platform, comes into play.
iotega uses PowerG Technology to help you get the most out of your security when it comes to your home. PowerG makes the iotega reliable, private and high performance. The device also takes advantage of cyber protection features to bring you the highest level of safety possible.
One of the best parts is that iotega operates flawlessly with the voice-activated devices you likely already own. Whether you want to control the system from its 7-inch touchscreen or from your smartphone, learning how to access and manage the device is quick and easy.
Key Features
iotega offers security, video monitoring, home control, energy management and health and safety features all in one place. DSC often outlines three main benefits of the iotega: security, simplicity and scalability.
The device is secure because it’s designed with PowerG technology. The system uses 128-bit Advanced Encryption Standard (AES) encryption. AES is thought to be logically unbreakable. To break it would take a massive computational effort that is far more powerful then the world’s current supercomputers are capable of carrying out.
As far as simplicity goes, the device is quick and easy to install. You can program in your schedules and events, like when you leave for work, to make the device automated. The sleek, discrete design also helps you place the box anywhere you’d like in your home.
If you only have a few smart home devices, you might think this system is more than you need. Fortunately, it works with as many smart devices as you have.
Whether you’re aging in place or simply growing up in the modern age, you’ll likely upgrade to more smart devices as time passes. You need a system that can keep up with you and your expanding technology base.
Two Uses, One System
Home automation lets you control devices in your home remotely.
With the right system, you can control numerous smart home devices, from flood monitors to lights and even electrical outlets, all from your cell phone. That being said, you also need to have a way to monitor your homes security. You need to have 24/7 access and control of your cameras, smoke detectors and window locks.
For most, two separate automation systems are needed to manage a home; one to do the home automation and the other for security automation. With the iotega, you can manage both your security and home devices all from one place.
Until recently, these types of all-in-one systems were mostly found in lavish homes or large commercial buildings. Now, though, the technology is available to people with varying social situations.
Software Setup
Prior to actually installing the device, you need to set up its software. You can complete this task with any internet-enabled device you own, but a laptop or desktop is likely easiest.
- Within your browser window, type in “http://cloud.secure.direct/smarttech”
- Once the portal is up, you’ll enter the login information from SecureNet Technologies
- Then, make your own account:
- On the left side of your screen, look for “Accounts”
- When you tap this icon, a drop-down will open
- Click “Search Accounts,” and you will then see a list of all your accounts
- If you’re a new user, hit “Add Account” in the top right of your screen
- In the window that opens, you’ll need to first pick your account ID. You can use the radio button to choose whether you’d like to manually enter your ID or have one picked for you. In general, it’s easier to have your ID assigned to your profile
- Under “Panel Type,” you’ll choose “iotega” from the menu. You’ll need to proceed by filling in all of the required fields, which are marked with an asterisk (*)
- After you’ve entered the required data, you can move to the next step of the software activation process.
Choosing a service plan is key to success.
- Next to “Select Service Plan” use the drop-down to pick your dealer
- You’ll hit “Finish,” and you should then see an account summary page
- If you’re ready to activate your device, click “Go Live”
After this button is selected, your services will begin. In the event you’re not ready to be billed or you want to delay your services, make sure you don’t select “Go Live.” You can always push this button at a later date when you’re ready to take advantage of your iotega system.
The next step is to add a gateway.
A gateway is simply a router in a computer network.
To add,
- select “System” from the left side of the home menu
- An “Add Gateway” button will then be displayed
- After you hit this button, make sure your “Panel Type” is iotega
You’ll then need access to your device to enter its ID. Generally, the iotega ID can be found on the underside of the unit. If the ID has dots, dashes or other symbols, you can ignore them. You only want to enter the numbers and letters found in the ID. After the entire string of numbers and/or letters is added, you’ll select “Done.” The gateway should then be added successfully.
To set yourself as the main user,
- click “Contacts”
- Complete the form, making sure to check “Master,” under the “Add Contact” menu
- Here, you’ll be able to create a username and password
- Under “Alarm User” make sure the “User ID” menu reads “Master”
- Finally, enter the “Panel Access Code,” which is “1234” by default.
After you finalize the new contact, you’ll be able to see its details under the contact page. If any errors are present or you have to make changes down the line, you can do so from the “Contacts” page.
Installation
At this point, your software is setup. The next step is to find a place for the device.
To install your iotega,
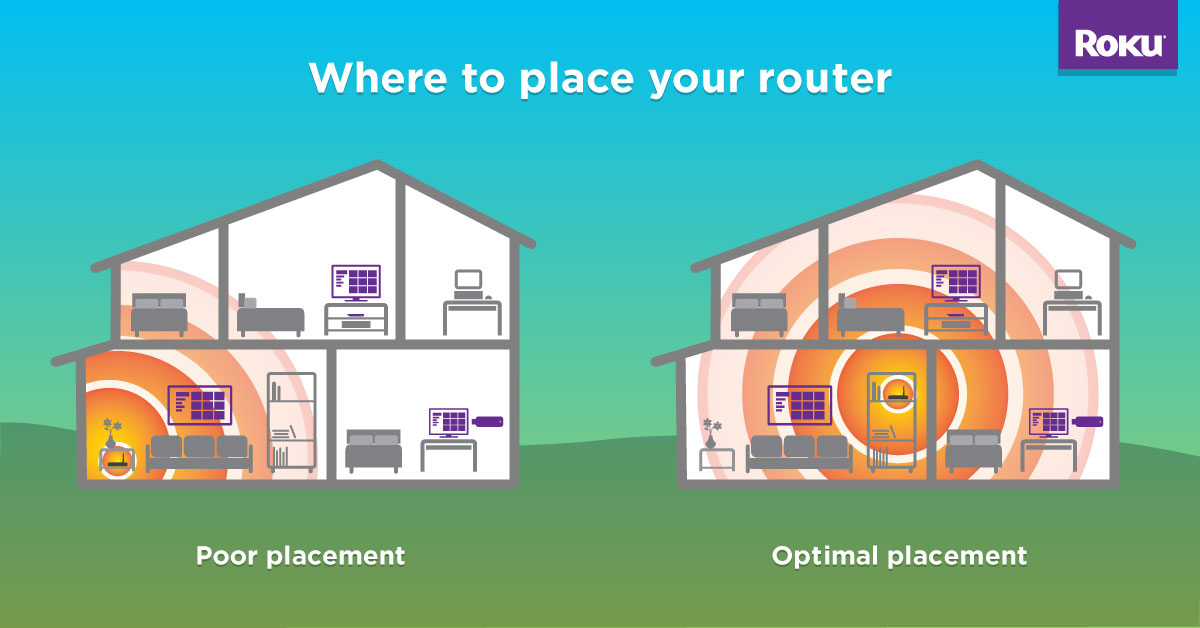
- to get the most out of your unit, make sure it’s placed in a central location.
As you decide where you’d like it to be placed, try to avoid putting it in an area with a lot of metal objects. For example, a kitchen with a lot of appliances generally isn’t the best location for a Wifi-enabled device.
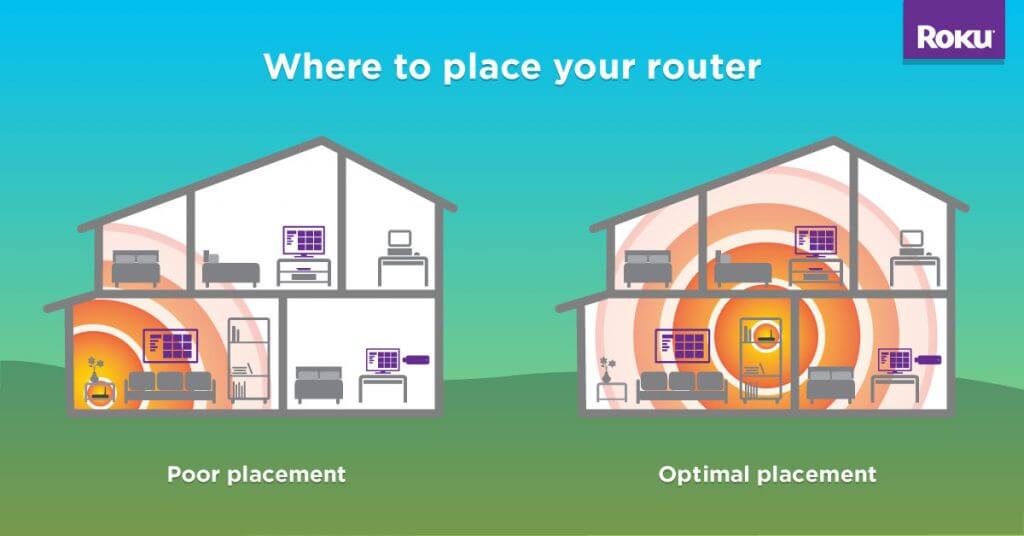
- After you’ve found your area, see if you can put your unit high. Sometimes, a high shelf or location will give you a better signal. Make sure the area you’re placing the iotega is flat, stable and temperature controlled. You’ll also need to make sure there’s power and Ethernet outlets close by
- Before you plug in your device, pull out the plastic tab to activate its battery
- Then, connect the Ethernet cable to its matching port as well as your wireless router
- The plug adapter then needs to be attached to the device’s power connecter as well as an AC outlet
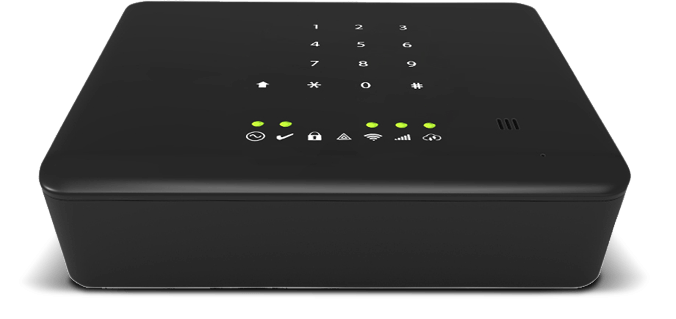
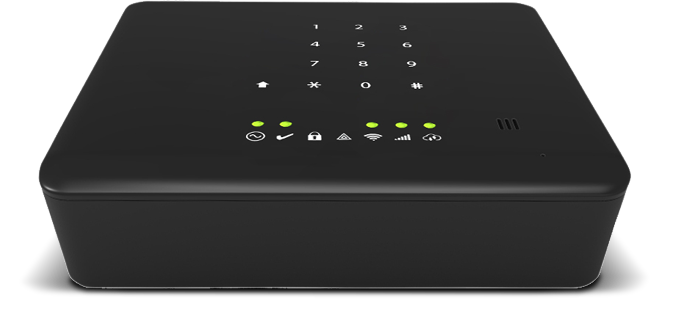
As soon as you plug your device into the outlet, it’ll power on. In general, the activation process takes a couple of minutes. You’ll know the device is on when there is a steady green light on the right-hand Ethernet light and a blinking red light on the other side.
The LED lights on the iotega panel can tell you a lot about what’s happening with your unit. When the power light is on, AC power is connected. The check icon, which is the ready to arm icon, will show a steady green when the security system is turned off and waiting to be activated. The lock icon will display a solid red light when the system is armed.
As soon as you disarm the device or turn the alarm off, the red light will power off. If there is an issue with your device, a steady yellow light will display above the triangle icon, which signifies system trouble.
The Wifi icon hints at your overall connection; full green means there’s a strong signal, steady yellow signifies a poor signal and consistent red means there is no connection available.
Checking Your Connection
Head back to your computer and open your portal again. Under “Panel Settings,” you can check the communication status of your system. Navigate to the main menu, and then hit “Accounts” followed by “Search Account.” Pick your master account, assuming this is the one you’re using for setup. Under your “Accounts” menu, click “Panel Settings.”
After a few moments, the system communication status should populate at the top of the screen. If it doesn’t seem to be working properly, you can hit “Refresh Online Status” and “Refresh All.” The status should either read “Online” or “Offline.”

At this point, you’ll enroll all zones and devices. Under “Panel Settings,” click the “Zones” tab followed by “Add Device.” There are two main ways to enroll your devices. You can either type in the device’s serial number into the blank field or you can auto enroll the unit.
When you manually enter the device, a valid serial number will show you more fields and let you customize your enrollment. Adding by auto enrollment is easier for some users. To do this, hit the “Auto Enroll On” button. After this button is on, press and hold the “Device Enroll” button until you see an LED system light come on.
Now, your system is established and your devices are added. As you might have imagined, there are a few things that can go wrong in this process. One great way to make sure the setup process goes according to plan is with the help of a technical computer support company.
Troubleshooting Know-How
As described above, if an issue occurs, the triangle icon will illuminate, signifying system trouble. You can also turn on a setting so your system will beep every 10 seconds while there’s an error. By default, the beep is set to silent, so you’ll need to turn it on to take advantage of this feature.
Using the iotega keypad, press “*2.” If you don’t have a required access passcode, your iotega should then display up to three lines of information about what’s wrong. After you have an idea of what’s going on, you can look it up in the manual or reach out to HelpCloud for more help.
Home Security at Its Finest
As you add more smart devices to your home, you need a way to manage them on an all-in-one platform. With iotega, you can manage your home and security with peace of mind and ease.
